Post-installation configuration
Selecting display resolution
The display resolution is defined by Mode Lines, which we'll look at in detail on page 513. The names relate to the resolution they offer. By default, xf86cfg only gives you 640x480, so you'll certainly want to add more. First, select the field at the top left of the screen:
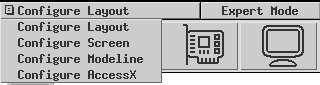
From this menu, select Configure ModeLine. You see:
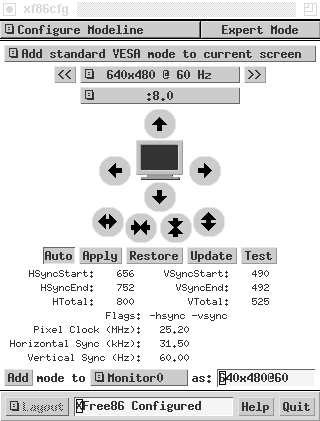
If you pass the cursor over the image of the screen, you'll see this warning:

Take it seriously. We’ll look at this issue again in Chapter 28 on page 510. For an initial setup, you shouldn't use this interface. Instead, select Add standard VESA mode at the top. We get another menu:

Select the resolutions you want with the highest frequency that your hardware can handle. In this case, you might select 1024x768 @ 85 Hz, because it's still well within the range of the monitor. Answer yes to the question of whether you want to add it. You can select as many resolutions as you want, but the ModeLine window does not show them.
You can also use the ModeLine window to tune the display, but it's easier with another program, xvidtune.We'll look at those details in "XFree86 in depth" .
Finally, select Quit at the bottom right of the display. You get this window:

When you answer Yes, you get a similar question asking whether you want to save the keyboard definition. Once you've done that, you're finished.
Desktop configuration
Next, select Desktop from the Configuration menu. You get this menu:

Which one do you install? You have the choice. If you know what you want, use it. There are many more window managers than shown here, so if you don't see what you're looking for, check the category x11-wm in the Ports Collection. The select menu gives you the most popular ones: Gnome, Afterstep, Enlightenment, KDE, Window maker and fwm2. In this book, we'll consider the KDE desktop and the fvwm2 window manager. KDE is comfortable, but it requires a lot of resources. Gnome is similar in size to KDE. By contrast, fvwm2 is much faster, but it requires a fair amount of configuration. We'll look at KDE and fvwm2 in "The tools of the trade" .
Additional X configuration
At this point, we're nearly done. A few things remain to be done:
- Decide how you want to start X. You can do it explicitly with the startx command, or you can log in directly to X with the xdm display manager. If you choose start x, you don't need to do any additional configuration.
- For each user who runs X, create an X configuration file.
Configuring xdm
To enable xdm, edit the file /etc/t/ys. By default it contains the following lines:
ttyv8 "/usr/X11R6/bin/xdm -nodaemon" xterm off secure
Using an editor, change the text off to on:
ttyv8 "/usr/X11R6/bin/xdm -nodaemon" xterm on secure
If you do this from a running system, send a HUP signal to init to cause it to re-read the configuration file and start xdm:
# kill -1 1
This causes an xdm screen to appear on /dev/ttyv8. You can switch to it with Alt-F9.
User X configuration
If you're starting X manually with startx, create a file .xinitrc in your home directory. This file contains commands that are executed when X starts. Select the line that corresponds to your window manager or desktop from the following list, and put it in .xinitrc:
Startkde    for kde
exec gnome-session   for Gnome
fvwm2        for fvwm2
If you're using xdm, you put the same content in the file .xsession in your home directory.
Rebooting the new system
When you get this for, you should have a functional system. If you're still installing from CD-ROM, you reboot by exiting sysinstall. If you have already rebooted, you exit sysinstall and reboot with:
# shutdown -r now
Don't just press the reset button or turn the power off. That can cause data loss. We'll look at this issue in more detail on page 541.